5 years ago
Tuesday, December 28, 2010
Pocket tutorial
ikat bag (http://www.ikatbag.com) has a great tutorial on how to make pockets. Be sure to check it out.
Wednesday, December 15, 2010
Toddler Backpack
 I made this backpack for my 1 year old son based on a pattern and tutorial at indietutes.


In my version, I created a front pocket and inside pocket from a thrifted Spiderman pillowcase. I also added a zipper as my son has zipper skills. At the top of the bag I added a loop as a handle and a small loop on the inside to hold his toy keys.
Wallet
 I made this play wallet for my son based on a tutorial and pattern posted on sewing.about.com
 My version included a section to hold bills and did not use bias tape for binding.
Saturday, November 6, 2010
Resized t-shirt
 I didn't take a before picture, but this shirt used to be larger. I used Jalie pattern 2918 to resize it to a toddler size 2. I have had to adjust the neck size from the pattern. As is, the shirts do not fit over my toddler's head. I have to make the opening 1/8" - 1/4" larger to fit over his head and have had to adjust the neck binding as well.
T-shirt
 This is a t-shirt that I made from my fabric stash using Jalie pattern 2805. This is the 4th shirt I've made using this pattern. This is my new go-to pattern for t-shirts. The fit is flattering and it is quick and easy to sew. I've also resized other t-shirts using this pattern for a better fit.
Resized Hawaiian shirt
 I found a men's Hawaiian shirt at goodwill for $1. I liked the print and wanted to resize it to fit me and my shape. I cut apart the shirt and used Simplicity 9816. I like this shirt pattern as it has different patterns for different cup sizes (no calculating or altering that I would normally need to do) to ensure a good fit. I laid the pattern pieces on the shirt and cut around them. I lined up the bottom hemline on the pattern so I would not have to hem the shirt when I was finished. I also lined up center front with the center front of the pattern so I would not have to redo the buttons or button holes. Sometimes I feel like this is the cheater way to sew, but it saves a lot of time when it is already done.
Training underwear
 I made this training underwear from my flannel stash and the training pants pattern from new conceptions. At first attempt, my toddler refused to wear the underwear and I thought that it may have been uncomfortable for him. On the second attempt, he did wear the underwear and I could see the fit better. The second time around I liked the fit better. The underwear has a high waist design and the leg openings are big. They definitely would not contain a poop on my child who is on the thinner side. When it is time for potty training, I do think that they will serve their purpose (he isn't quite ready yet). If I were to redesign this pattern for a better fit, I would lower the waist (who wears anything that high anymore?) and lower the leg openings so they fit a thinner child a little better.
-My favorites are the frog underwear :)
-Update 2011: I love this pattern now. They flannel is more absorbant than store bought training underwear. Now that my kids are 2 and 3 (instead of 1 when I first made the underwear), the fit is different. It it not too high waisted and fits snugly like it should. It does actually contain poop accidents too. I use these daily with my kids and it saves us a lot of money since we are not buying pull-ups.
Underwear out of t-shirts and knit scraps

I bought the children's underwear pattern from youcanmakethis.com. I am usually hesitant to buy .pdf patterns as I have had bad luck in the past with some. I have to say that I love this pattern. If you use knit scraps and recycled t-shirts, the underwear costs less than 50 cents a pair to make or free if you the supplies on hand. So far I have completed one boys' pair in size 2 and one girls' pair in size 2. The instructions were great and I love that the pattern does not use elastic for the binding (it uses a knit fabric with some lycra in it for extra stretchiness plus resilience). The only tricky part was that an exact measurement was not included for the opening on the boys' pattern and I was not sure how far to stretch the binding as I pinned it on. It turned out okay after pressing and it will likely go more smoothly as I make more.
Saturday, October 30, 2010
Last minute Spiderman Costume
My son has recently taken an interest in spiderman. I decided to make him a last minute costume that could double as pajamas. I bought 3 thrifted t-shirts (2 red and 1 blue) from Goodwill for $3. I cut the t-shirts apart and adapted Jalie pattern 2918 for the top and __ pattern for the pants.
I had to piece the back togeter as I ran out of blue. I created the red bug shape on the back by drawing the shape on the center of blue back, pinning red fabric underneath, sewing on my drawing lines, and cutting out 1/8 inch inside the sewing lines to reveal the red bug shape underneath.
 I drew on the black spider and web lines using a black fabric paint pen from JoAnns.

Thursday, October 28, 2010
Pillowcases recycled into reusable shopping bags
At http://sewingdork.blogspot.com/2010/10/easy-five-step-market-tote-and-its.html , I saw how one blogger turned thrifted pillowcases into reusable shopping bags.
I got these pillowcases at GoodWill on 50% off Saturday for 75 cents to use for my reusable shopping bags.
 I made my straps out of heavy denim that I had on hand. The straps are 1.5 inches by 50 inches. I serged around each strap to finish the edges. Then I sewed the straps on 5 inches from the side of the pillowcase to the edge of the strap. Next were the side seams and top edge. The link above includes a tutorial on how she made the bags. Instead of using bias tape to encase the top edge, I just sewed the pillowcase closed on the open side. Also, to make the bag have more of a bottom shape for holding groceries, I sewed each corner in to form the box shape.

I think they turned out cute and we picked out colorspatterns my husband wouldn't mind being seen carrying. I've used them the past 2 weeks and they have already saved me 10 cents at Sprouts and have held up for carrying groceries without a problem.
I made the straps a little longer than in the tutorial. I like them a little longer so I can carry them in my hand, over my arm, or over my shoulder.
I got these pillowcases at GoodWill on 50% off Saturday for 75 cents to use for my reusable shopping bags.
 I made my straps out of heavy denim that I had on hand. The straps are 1.5 inches by 50 inches. I serged around each strap to finish the edges. Then I sewed the straps on 5 inches from the side of the pillowcase to the edge of the strap. Next were the side seams and top edge. The link above includes a tutorial on how she made the bags. Instead of using bias tape to encase the top edge, I just sewed the pillowcase closed on the open side. Also, to make the bag have more of a bottom shape for holding groceries, I sewed each corner in to form the box shape.
I think they turned out cute and we picked out colorspatterns my husband wouldn't mind being seen carrying. I've used them the past 2 weeks and they have already saved me 10 cents at Sprouts and have held up for carrying groceries without a problem.
I made the straps a little longer than in the tutorial. I like them a little longer so I can carry them in my hand, over my arm, or over my shoulder.
Thursday, July 15, 2010
Cloth Diapering: Evaluations a year later
After over a year of cloth diapering, if I had to do it over, I would still cloth diaper with a few changes.
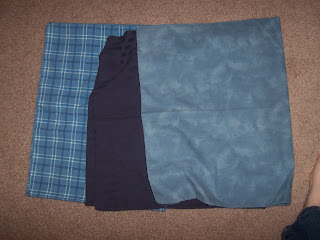
I would probably stick with just prefold diapers (they are the cheapest and have held up well) with gusseted covers. These have held up the best over the past year.
Lessons learned:
I used to have to change my little one half way through the night or he would leak through his diapers. Now at night, I put two diapers in the same cover and my little one is good to go til morning.
I would have made (and still need to make) a liner for my diaper pail. This can be made with PUL fabric so it is water proof and can be washed with the dirty diapers. I think this would help with the diaper pail smell that currently lingers in the pail.
For the poo-pocket diapers I made, the elastic is wearing out. I used the clear elastic that is supposed to be best for diapers and withstand the repeated washings and exposure to bodily fluids. I'm not very happy about the elastic wearing out.
I still use these diapers and they have good absorbency (as I made them with hemp fabric), but I am also not happy with the bamboo-cotton velour I used on the inside of the diapers. It is also absorbent, but the softness and pile of the velour has not held up. I would have been better off making the entire diaper out of hemp.
Saturday, March 6, 2010
Using the diapers
Cloth diapering is easier than I had originally thought.
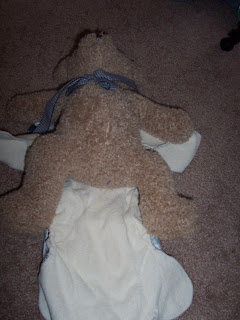
For the poo-pockets, I wrap the diaper around the baby (or teddy bear for pictures as my baby doesn't hold still), and then wrap the cover on top. Very easy and quick.


Then, I wash diapers every other day. I just put the diapers from the orange bucket into the washing machine. I run a normal cycle in hot water with Allen's detergent (you will want to buy special detergent that won't build up and reduce absorbency in your diapers), I also add in a pre-wash and an extra rinse.
For drying the diapers, I do the shortest cycle on the dryer and use dryer balls (fabric softener is not recommended as it can reduce diaper absorbency). Then I hang the diapers on a drying rack to finish drying. You can dry them completely in the dryer. I prefer the short cycle (to soften the diapers) and then air dry on the racks.
For the poo-pockets, I wrap the diaper around the baby (or teddy bear for pictures as my baby doesn't hold still), and then wrap the cover on top. Very easy and quick.

Step 1: Lay out the diaper cover and place the diaper on the cover. Lay the baby on top of the diaper.

Step 2: Wrap the poo pocket around the baby.

Step 3: Wrap the cover over the diaper and around the baby and over the diaper.
For the pre-fold diapers lay the diaper in the cover and put it on like a disposable by wrapping it around the baby and then securing it with the aplix (velcro-like) fasteners.


I put used diapers in an orange bucket that I got at Home Depot. This is called the dry pail method. While a baby is only breastfed, the diapers do not even need to be rinsed first.
Once my baby started solids, I needed to start rinsing his bowel movements out of the diapers. This is very easy with a toilet sprayer and potty pail. The sprayer attaches to the toilet. The pail has a hole in the bottom and sits on top. I spray the diaper in the pail and it goes right into the toilet to flush away. It really is quick and easy.

Then, I wash diapers every other day. I just put the diapers from the orange bucket into the washing machine. I run a normal cycle in hot water with Allen's detergent (you will want to buy special detergent that won't build up and reduce absorbency in your diapers), I also add in a pre-wash and an extra rinse.
For drying the diapers, I do the shortest cycle on the dryer and use dryer balls (fabric softener is not recommended as it can reduce diaper absorbency). Then I hang the diapers on a drying rack to finish drying. You can dry them completely in the dryer. I prefer the short cycle (to soften the diapers) and then air dry on the racks.
Thursday, March 4, 2010
Cloth diapering: The covers
Once I had my diapers, I needed covers to make them waterproof.
I used the New Conceptions pattern for the quick wrap. I used an inner layer of PUL fabric and an outer layer of a knit print fabric that I had in my fabric stash. I finished the edges with Fold over elastic.
These covers work well with prefold diapers, but my poopockets did not fit inside the smaller-sized covers.
For my poopockets, I use the Very Baby Sung Wrap cover.
You can purchase similar pre-made covers online.
***Key to cloth diapering****
Either your cover or your diaper needs to have gussets. The gussets stop the poopies from leaking out of the diaper onto clothes.
Cloth diapering: The beginning
I knew I wanted to cloth diaper long before I was even pregnant. I researched and prepared.
I started with the Chloe Toes diaper pattern and made the newborn size pocket diapers. The diapers I made leaked as there was not a snug fit from the leg elastic. Pee and poo just came out the leg openings.
Next, I tried the poo pocket pattern. The diapers were easy and quick to sew. I made these out of bamboo velour and hemp jersey or hemp fleece. This set turned out great as is highly absorbent. These were too big for my newborn, so I needed the smaller size. I made the smaller size out of cotton flannel. I did not like these as well as they were not as absorbent and leaked. I ended up having to double these with a prefold diaper to increase the absorbency for my newborn. The bamboo/hemp versions are highly absorbent and I do not have leaking problems.
I also bought a set of prefold diapers. I wanted to have these on hand.
I regularly use the prefolds and my bamboo/hemp poo pockets.
Tuesday, March 2, 2010
Fabric Books
My 11 month old loves looking through "Your Baby Can Read" Lift a Flap Books. The books aren't cheap, so we don't let him play with them (only adult supervised reading). He likes them so much, I wanted to make him some books that he can read on his own (no adult supervision required to protect the books). So, I made a fabric version using iron on transfer and words and pictures printed from my computer.
Here's how I did it.
1)Created a word document with the words I wanted to use and printed it on the iron on transfer sheet.
2) Printed pictures (some from the Picture This CD) and some from my own picture files.
3) Cut 8.5"x11" rectangles out of white muslin. Ironed on the photos. Cut out the same size rectangle from scrap fabric for the backing and of thin batting. Sewed the 3 layers together and then turned them right-side out. Then top-stitched 1/4" around the page. I also stitched 1" along the edge that will be bound.
4) Next I cut more 8.5"x11" rectangles out of white muslin. I folded the rectangles in half, and then ironed on the words. I refolded the rectangles with the words on the inside and stitched 1/4" on each side. Then I turned the flap to the outside and pressed the edges.
5) Next, I pinned the flap on the book page and sewed 1/4" (See picture below).

6) Then I turned the flap down and stitched a 1/4" again (see picture below).

7) Then I marked where I wanted the binding. I made a small button holes for the binding rings to go through. I got these rings at Walmart.

-You may wonder why I bothered to make the word flaps instead of putting the word under the picture. First, the Flip-a-flap books are set up this way. Second, there is empirical research that suggests that presenting a picture with the word may block learning to read the word for individuals with developmental disabilities (Fossett & Mirenda, 2006).
Fossett, B., & Mirenda, P. (2006). Sight word reading in children with developmental disabilities: A comparison of paired associate and picture-to-text matching instruction. Research in Developmental Disabilities, 27, 411-429.
Subscribe to:
Posts (Atom)


